Archive for the 'Cinco de Mayo' Category

Restaurant Style Salsa

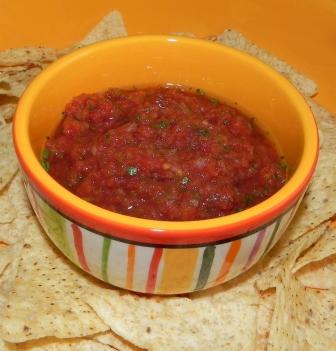
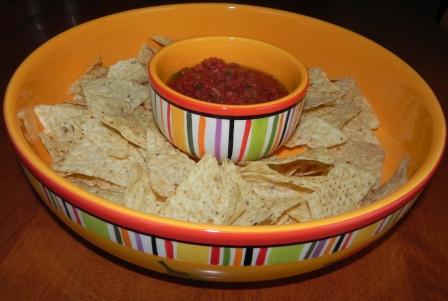
Fresh salsa made from scratch has been on my “to-make” list for a while now, and since today is Cinco de Mayo, it seemed like the perfect week to make it.  I used The Pioneer Woman’s recipe and it was fabulous!  This salsa is so easy to make– just throw all the ingredients in a food processor, pulse a few times, and it’s ready.  The flavors of garlic, onion, tomatoes, lime, chilies, and cilantro are delicious.  It tastes like it came from an authentic Mexican restaurant.   I prefer my salsa to be mild so I left the jalapeno seeds out, but if you like more spice, leave them in!  One thing I love about this salsa is that it has such a smooth texture.  Since you are making it yourself, you can puree it to your liking so that it’s as smooth or chunky as you want.  This salsa tastes even better after it has chilled in the fridge and all the flavors have marinated and melded together.  It’s the perfect appetizer to make for your next party.  Enjoy!
Restaurant Style Salsa

(print recipe)

Ingredients

  • 1 can (28 Ounce) whole tomatoes with juice
  • 2 cans (10 Ounce) Rotel (diced tomatoes and green chilies)
  • ¼ cup chopped onion
  • 1 clove garlic, minced
  • 1 whole jalapeno, quartered and sliced thin (seeds optional)
  • ¼ teaspoon sugar
  • ¼ teaspoon salt
  • ¼ teaspoon ground cumin
  • ¼ cup cilantro (you can add more if you want)
  • lime juice from ½ of a lime

Directions

  1. Combine whole tomatoes, Rotel, onion, jalapeno, garlic, sugar, salt, cumin, lime juice, and cilantro in a blender or food processor.  Pulse until you get the salsa to the consistency you’d like—about 10 to 15 pulses.
  2. Test seasonings with a tortilla chip and adjust as needed.
  3. Refrigerate salsa for at least an hour.  Serve with tortilla chips.

Note: This makes a very large batch.  Recommend using an 11-12-cup food processor, or you can process the ingredients in batches and then mix everything together in a large bowl.

Serves: 12

Source: The Pioneer Woman

And here are some other delicious Mexican-inspired recipes to try:

Grilled Chicken Fajitas — The marinade for these fajitas is fantastic.  Served on tortillas with grilled bell peppers and onions, these fajitas are the perfect main course.

Rice with Black Beans and Corn is a wonderful side dish to make alongside grilled chicken fajitas.  It’s colorful, flavorful, and so delicious.  You can also serve this rice burrito-style along with some melted cheese and/or grilled chicken.

Grilled Chicken Fajitas

Grilled Chicken Fajitas

Happy Cinco de Mayo!  To celebrate, I made chicken fajitas.  I used this recipe from Annie’s Eats, and I really liked it.  The marinade is wonderful.  I will definitely be making these fajitas again, the next time I am in the mood for Mexican food!   I made a couple of modifications to the recipe.  The recipe calls for a jalapeño, but I omitted it, and I think the marinade was just fine without it.  I also used fresh Italian parsley instead of cilantro.  The parsley gave the fajitas a bit of freshness, which I really liked.  But I’m sure that cilantro would be good too!  Eric grilled the fajitas indoors, on a cast iron grill pan, and it worked really well.  We received this grill pan as a wedding gift from Williams Sonoma, and highly recommend it.  But you could also use a charcoal or gas grill.  As a side dish, I made rice with black beans and corn, and it went very well with the fajitas.  Enjoy!

Grilled Chicken Fajitas

(print recipe)

Ingredients

  • 1/3  cup freshly squeezed lime juice
  • 6 tbsp. vegetable oil, divided
  • 3 cloves garlic, minced or pressed
  • 1 tbsp. Worcestershire sauce
  • 1½ tsp. brown sugar
  • 1 jalapeño, seeded, ribbed and diced (optional)
  • 1½ tbsp. minced fresh cilantro or parsley
  • 1 tsp. salt
  • ¾ tsp. pepper
  • 2-3 boneless, skinless chicken breasts, butterflied (6 halves total), about 1½ lbs.
  • 1 large red onion (about 14 oz.), sliced into ½-inch thick slices, rings not separated
  • 2 large bell peppers (about 10 oz. each), stemmed, quartered and seeded
  • 8-12 (6-inch) flour tortillas

Directions

  1. In a medium bowl, whisk together the lime juice, 4 tablespoons of the vegetable oil, garlic, Worcestershire sauce, brown sugar, jalapeño, cilantro, salt and pepper.  Reserve ¼ cup of the marinade; set aside.  Place the chicken breast halves in the marinade, cover with plastic wrap and refrigerate for 15 minutes.  Brush both sides of the onion rounds and peppers with the remaining 2 tablespoons vegetable oil.  Season with salt and pepper.
  2. Heat a cast iron grill pan over medium-high heat.  Using a paper towel, carefully brush the grill pan generously with vegetable oil several times to ensure that it is well-oiled.
  3. Remove the chicken breast halves from the marinade and transfer to the grill pan; discard the left over marinade.  Cook the chicken until it is well browned and has nice grill marks, 4-6 minutes.  Using tongs flip the chicken over and continue grilling until it is no longer pink inside (or an instant-read thermometer inserted into the center reads 160˚ F.)  When the chicken is done, transfer it to a large plate and tent with foil to keep warm.
  4. Place the onion rounds and peppers on the grill pan.  Cook the onions and peppers until spottily charred and crisp-tender, about 8-12 minutes, turning once or twice as needed.  When the vegetables are done, transfer them to the plate with the chicken.
  5. Cook each tortilla, one at a time, on the grill pan until warm and lightly browned, about 20 seconds per side.  When the tortillas are done, wrap them in a clean kitchen towel or foil to keep warm.
  6. Separate the onions into rings and place them in a medium bowl.  Slice the bell peppers lengthwise into ¼-inch strips and add them to the bowl with the onions.  Add 2 tablespoons of the reserved unused marinade and toss well to combine.  Slice the chicken into ¼-inch strips and toss with the remaining 2 tablespoons of reserved marinade in another bowl.  Arrange the chicken and vegetables on a large platter with the warmed tortillas and serve.

Serves: 4-6

Recipe adapted from: Annie’s Eats blog; Originally from: The Way the Cookie Crumbles Blog and Cook’s Illustrated

The cast iron grill pan always creates really nice grill marks.


Enter your email address to subscribe to this blog and receive notifications of new posts by email.

Join 75 other subscribers