Apple Pie

I made this pie a few days ago using my favorite apple pie recipe.  I’ve made this recipe several times before, but it was even more fun making it this time because I had two little helpers in the kitchen with me.  My twins are now 6 months old, and they had so much fun sitting in their high chairs watching me chop the apples and prepare the filling.

The method for making this pie is a little unusual because you pre-cook the apple filling in a Dutch oven before baking it.  There is nothing better than the smell of apples, cinnamon, and sugar simmering away on the stove!  This pie is delicious served warm with some vanilla ice cream, or you can eat it cold for breakfast like we sometimes do. :)   Enjoy!

Apple Pie

(print recipe)

Ingredients

For the dough:

  • 2 ½ cups all-purpose flour
  • 1 tsp. salt
  • 2 tsp. granulated sugar
  • 16 Tbs. (2 sticks) cold unsalted butter, cut into 1/2-inch dice
  • 3 to 4 Tbs. ice water

For the filling:

  • 2 lb. Granny Smith apples, peeled, cored and cut into slices ¼ inch
    thick
  • 2 lb. Pink Lady apples, peeled, cored and cut into slices ¼ inch thick
  • ½ cup firmly packed light brown sugar
  • ¼ cup granulated sugar
  • ½ tsp. ground cinnamon
  • ¼ tsp. salt
  • ¼ tsp. freshly grated nutmeg
  • 4 tsp. cornstarch
  • 1 Tbs. fresh lemon juice
  • 2 Tbs. cold unsalted butter, cut into half-inch pieces
  • 1 egg white, beaten with 1 tsp. water
  • 2 tsp. granulated sugar

Directions

  1. To make the dough, in a food processor, pulse the flour, salt, and granulated sugar together until combined, about 5 pulses.  Add the butter and process until the mixture resembles coarse meal, about 10 pulses.  Add 3 Tbs. of the ice water and pulse 2 or 3 times.  The dough should hold together when squeezed with your fingers but should not be sticky.  If it is crumbly, add more water 1 tsp. at a time, pulsing twice after each addition.  Turn the dough out onto a work surface, divide in half and shape each half into a disk.  Wrap the disks separately in plastic wrap and refrigerate for at least 2 hours or up to overnight.
  2. On a lightly floured work surface, roll out half of the dough into a 12-inch round about 1/8 inch thick.  Fold the dough in half and then into quarters and transfer it to a 9-inch deep-dish pie dish.  Unfold and gently press the dough into the bottom and sides of the dish. Trim the edges flush with the rim of the dish.  Refrigerate for 30 minutes.
  3. On a large sheet of lightly floured parchment paper, roll out the remaining dough disk into a 12-inch round about 1/8 inch thick.  Using a small cookie cutter (I used a heart), make cut outs of the dough and place them on the parchment paper.   Reroll the dough scraps to make more cutouts.  Refrigerate the cutouts for 30 minutes.
  4. Meanwhile, make the filling: In a large Dutch oven, stir together the apples, brown sugar, granulated sugar, cinnamon, salt, nutmeg and cornstarch.  Set over medium heat, cover and cook, stirring occasionally, until the apples are just tender but not mushy, about 20 minutes.  Uncover and cook until the liquid has thickened and become glossy, 5 to 7 minutes more.  Remove from the heat, stir in the lemon juice and let cool to room temperature, about 30 minutes.
  5. Position a rack in the lower third of an oven, place a baking sheet on the rack and preheat the oven to 400°F.
  6. Let the pie shell and heart cutouts stand at room temperature for 5 minutes.  Transfer the apple filling to the pie shell and scatter the butter pieces on top.   Assemble the heart cutouts onto the pie filling, slightly layering them until the entire pie is covered.  Trim the edges flush with the rim of the dish and press the top and bottom crusts together to seal.  Brush the entire top crust with egg wash and sprinkle with the granulated sugar.
  7. Place the pie dish on the preheated baking sheet.  Bake until the crust is crisp and golden brown, about 1 hour, covering the edges with aluminum foil if they become too dark. Transfer the pie to a wire rack and let cool for at least 1 1/2 hours before serving.

Serves: 8

Source: Williams Sonoma

Top 10 Recipes of 2011

2011 was a busy year!  My twins arrived in September, so I didn’t spend quite as much time in my kitchen as I usually do.  Despite this, I did try several new recipes that were really good.  Here is a list of my favorite recipes that I made in 2011.  (Most of them are sweets – I definitely had a sweet tooth while I was pregnant. :)  )  Happy New Year!

Peanut Butter Oatmeal Chocolate Chip Cookies

Twix Caramel Brownies

S'mores Cake

Cinnamon Rolls

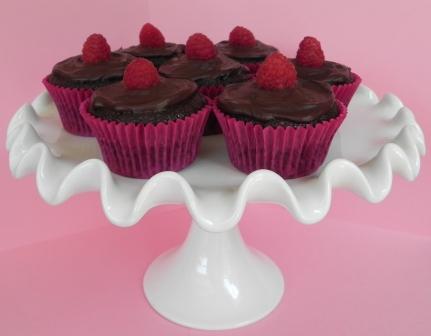
Double Chocolate Raspberry Cupcakes

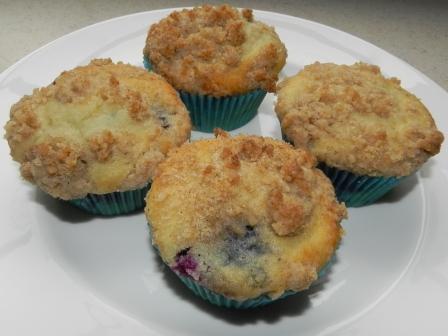
Blueberry Muffins

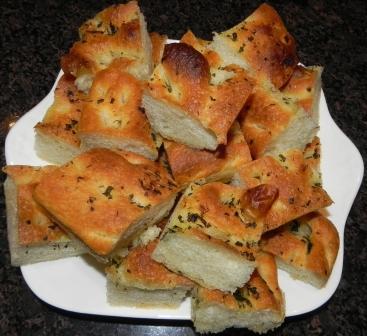
Focaccia

Triple Chocolate Mousse Cake

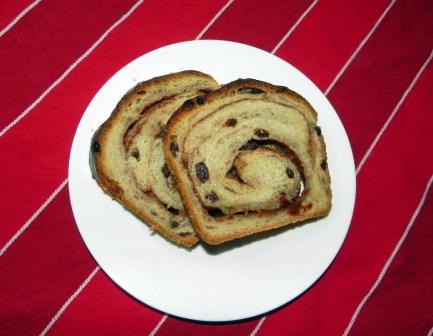
Cinnamon Raisin Bread

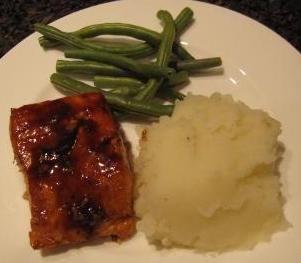
Asian Glazed Salmon

Happy Thanksgiving!

What a difference a year makes.  Last year I celebrated the holiday by hosting my very first Thanksgiving.  We had 19 guests at our house and I spent a lot of time planning and then preparing the meal.  It was so much fun to prepare everything and I loved being in charge of the menu, decorating the tables, and celebrating with our families.  You can read all about it by clicking here.

This year, we celebrated Thanksgiving with our two month old twins, who we are so incredibly thankful for.  Last year, I was busy baking and decorating turkey sugar cookies.  This year, I was busy dressing up my girls in their adorable little turkey outfits and celebrating their 1st Thanksgiving.  We also enjoyed a delicious meal and good company with my in-laws.

Eventually, I hope to get back to cooking and baking so that I can post some new recipes on my blog.  But for the time being, I’m spending all of my free time playing with and cuddling my sweet babies.  I hope everyone had a Happy Thanksgiving!

Favorite Fall Recipes

Happy first day of Fall!  Fall is my favorite season, for many reasons.  I love the cooler weather (perfect for cozy scarves and boots!), aromas of pumpkin, spice and pine, and celebrating the Holidays.  Another thing I love about Fall is all of the delicious food.  So in honor of the first day of Fall, here are some of my favorite Autumn recipes.  Enjoy!

Pumpkin Pecan Cupcakes with Cinnamon Spiced Whipped Cream

Golden Winter Soup

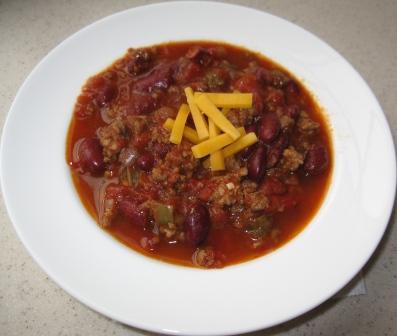
All-American Chili

Beef Bourguignon

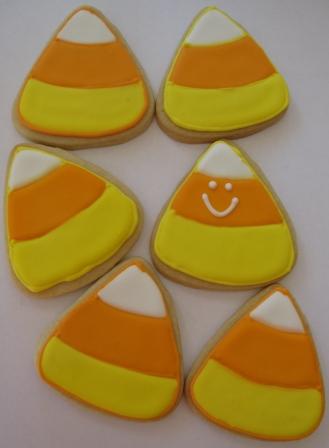
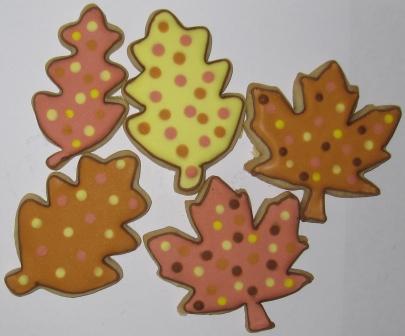
Halloween & Thanksgiving Sugar Cookies


Banana Cake with Chocolate Glaze

There are lots of different things you can make using overripe bananas.  Some of my favorite breakfast recipes using bananas are green smoothies, fruity smoothies, banana cinnamon muffins, and blueberry banana muffins.  Bananas are also great in desserts too – like in this delicious banana cake with chocolate glaze.  The cake itself tastes very similar to banana bread, but the addition of a silky chocolate glaze makes this cake extra rich and delicious.  This cake is extremely moist, and the chocolate complements the banana flavor very well.  Like most desserts I’ve been making lately, this cake is super easy to make.  The batter takes just a few minutes to mix up, and frosting the cake couldn’t be any easier – you just simply pour the warm chocolate glaze over the top of the cake and it will seep to the sides of the pan, thus covering the whole cake.  I recommend serving this yummy cake with a cold glass of milk.  Enjoy!

Banana Cake with Chocolate Glaze

(print recipe)

Banana Cake

Ingredients

  • 2 ½ cups all-purpose flour
  • 1 tablespoon baking powder
  • ¾ teaspoon cinnamon
  • ½ teaspoon salt
  • ½ cup (1 stick) unsalted butter, room temperature
  • ½ cup white sugar
  • ¾ cup light brown sugar
  • 2 large eggs
  • 3 overripe bananas, mashed
  • 1 teaspoon vanilla extract
  • ¾ cup buttermilk

Directions

  1. Preheat oven to 325 degrees F (160 degrees C). Grease a 9 x 13 inch baking pan.
  2. In a medium bowl, whisk together the flour, baking powder, cinnamon, and salt. Set aside.
  3. In the bowl of a stand mixer, cream together the butter and sugars until light and fluffy. Add the eggs one at a time, beating well after each addition. Mix in the bananas and vanilla extract.
  4. Alternatively add and beat in the flour mixture and buttermilk in 5 additions, starting and ending with the flour. Pour the batter into the prepared baking pan. Bake for 35-40 minutes, or until golden and a toothpick inserted in the center comes out clean. Let the cake cool completely before frosting.

Yield: One 13 x 9 inch cake

Source: slightly adapted from The Pastry Affair

Semisweet Chocolate Glaze

Ingredients

  • 8 oz. semisweet chocolate chips
  • ¼ cup heavy cream
  • 2 tbsp. unsalted butter cut into 4 pieces, at room temperature
  • 2 tbsp. light corn syrup

Directions

  1. Combine the chocolate, cream, butter and corn syrup in a double boiler or heatproof bowl set over simmering water.
  2. Heat until the chocolate has melted, and then whisk the ingredients together until completely smooth.  Pour the glaze over the top of the chilled cake, allowing it to run to the sides of the pan.

Note: The cake should be stored in the refrigerator.  You can serve it cold, or let it come to room temperature for 30-45 minutes before serving.

Source: Cooking with Karen; Originally adapted from Annie’s Eats

One Year Ago: Amaretto Madeleines

Peanut Butter Oatmeal Chocolate Chip Cookies

Now that I’m getting closer to the end of my pregnancy, I haven’t been cooking or baking nearly as much as I used to.  There are two reasons for this.  First, I’ve been spending a lot of my free time preparing for my babies to arrive, and second, I just don’t have the energy to spend hours in my kitchen like I used to.  I used to cook or bake something almost every day, but now it’s more like only once or twice a week.  Lucky for me, I married a man that likes to cook too, so he has been making a lot of our dinners lately.  :)  These days when I do cook, I’ve been choosing simpler, less time consuming recipes, so that I have more time to rest (and tackle my never-ending to-do list!)

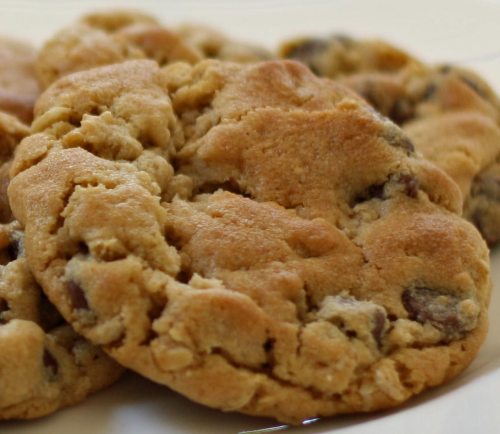
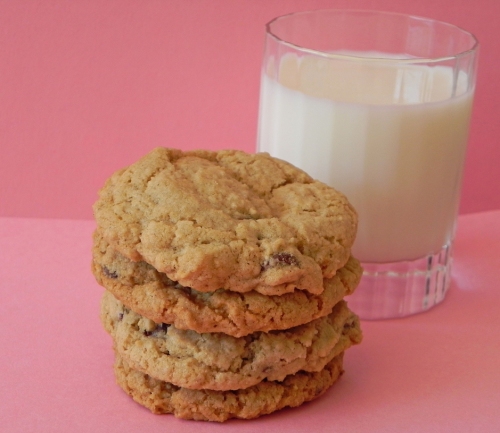
These peanut butter oatmeal chocolate chip cookies are a great example of the type of recipes I have been baking lately.  They take less than 20 minutes to make (plus cooking time).  If you’re fortunate enough to have your sister (or a friend) over to help you like I was, they take even less time!  :)  And all of the ingredients are common pantry items, so no special trip to the grocery store is needed.  These cookies are the perfect thing to make to satisfy your sweet tooth.  They are soft, chewy, and filled with the flavors of chocolate, peanut butter, and oatmeal – a classic and delicious combination.  I’m sure I will be making these cookies again and again!

Peanut Butter Oatmeal Chocolate Chip Cookies

(print recipe)

Ingredients

  • 1 cup all-purpose flour
  • 1 teaspoon baking soda
  • ¼ teaspoon salt
  • ½ cup (1 stick) unsalted butter, at room temperature
  • ½ cup creamy peanut butter
  • ½ cup granulated sugar
  • 1/3 cup light brown sugar
  • ½ teaspoon vanilla extract
  • 1 egg
  • ½ cup rolled oats
  • 1 cup chocolate chips

Directions

  1. Whisk together the flour, baking soda, and salt; set aside.
  2. On medium speed, cream together the butter, peanut butter, granulated sugar, brown sugar and vanilla extract, about 3 minutes.  Add the egg and beat to combine.  On low speed, gradually add the flour until just combined.  Stir in the oats, and then the chocolate chips.
  3. If desired, you may refrigerate the dough for at least 2 hours, but no more than 36 hours.
  4. A few minutes before you are ready to bake the cookies, preheat the oven to 350 degrees F.  Line two baking sheets with parchment paper.
  5. Use a large cookie scoop (3 tablespoons) and drop dough onto prepared baking sheets about 2 inches apart.  Bake for 10-12 minutes, or until the cookies are lightly golden and just set in the center.  Cool completely on the baking sheet and then store in an airtight container at room temperature.

Yield: 16-18 cookies

Source: Kristine’s Kitchen; Originally adapted from Brown Eyed Baker

One Year Ago: Mocha Cupcakes with Espresso Buttercream Frosting

Twix Caramel Brownies

When I first saw the recipe for these Twix Caramel Brownies on the blog ‘Two Peas and Their Pod’, I could not get them out of my mind.  I mean, how can you resist brownies made out of chocolate, caramel, and Twix bars??  I absolutely love the combination of chocolate and caramel, so I knew I would love these brownies.  After a few days went by and I still couldn’t stop thinking about these brownies, I finally decided it was time to give into my craving, so I picked up some Twix bars and caramel sauce at the grocery store, and then got to work in my kitchen.

And all I can say is wow.  These brownies are amazing!  They are definitely some of the best brownies I have ever had.  They are so fudgy, rich, and chocolaty.  And the addition of caramel and Twix bars takes them over the top – I love the extra little bit of crunch and sweetness that the Twix bars impart.  If you are in the mood for a fancier variation of classic brownies, try these Twix caramel brownies!

Twix Caramel Brownies

(print recipe)

Ingredients:

  • 1 cup (2 sticks) butter
  • 2 cups granulated sugar
  • 2 teaspoons vanilla extract
  • 4 large eggs
  • ¾ cup cocoa
  • 1 cup all-purpose flour
  • ½ teaspoon baking powder
  • ¼ teaspoon salt
  • 1 ½ cups chopped Twix candy bars
  • 1/3 cup caramel ice cream topping

Directions:

1. Heat oven to 350°F. Grease a 9 x 13 pan with cooking spray. Set aside.

2. Place butter in a medium saucepan on the stove. Heat over medium heat until the butter is melted. Remove from the heat and stir in sugar and vanilla extract. Add the eggs, one at a time, beating well with spoon after each addition. Add cocoa; stir until well blended. Add flour, baking powder and salt; stir until combined. Stir in Twix candy bar chunks. Pour batter into prepared pan.

3. Drizzle caramel evenly over the brownies. Using a toothpick, swirl caramel into brownies. Bake for 35-40 minutes or until brownies begin to pull away from sides of pan and a toothpick inserted in the middle comes out clean. Cool brownies completely in pan on a wire rack. Once cool, cut into squares and serve.

Yield: 24 brownies

Source: Two Peas and Their Pod

One Year Ago: White Wine Sangria


Green Monster Smoothie

Ever since the first time I heard of a green monster smoothie I was intrigued.  How could a smoothie with this much spinach in it not taste like, well, spinach?  I see variations of these green smoothies all the time on food blogs and healthy living blogs and everyone swears you cannot taste the spinach.  Don’t get me wrong, I do like the taste of spinach; it’s just not something I would have thought would be good in a smoothie.

But after making these delicious green monster smoothies, I can say that it’s true- aside from the pretty green color it imparts, you really cannot tell that there is spinach in these smoothies.  But it’s there (and lots of it too- 3 cups!).  It’s a great addition because it bumps up the nutrition factor, providing lots of calcium, vitamin C, fiber, folic acid, and potassium.  This smoothie is so refreshing.  I love the flavors of pineapple, pear, citrus, and bananas, and the honey adds a touch of sweetness.  The next time you are looking for a healthy snack or breakfast treat, try this smoothie recipe!

Green Monster Smoothie

(print recipe)

Ingredients

  • 1 banana (frozen or not), cut into chunks
  • 1 cup chopped frozen pineapple
  • 1 pear, coarsely chopped
  • 1½ cups orange juice
  • 3 cups baby spinach leaves, rinsed and dried
  • 1-2 tbsp. honey
  • 3 tbsp. ground flaxseed (optional)

Directions

  1. Combine all ingredients in a blender or food processor and puree until completely smooth.
  2. Taste and adjust sweetness with additional honey, if desired.  Serve immediately.

Yield: 2-3 servings

Source: Annie’s Eats

One Year Ago: Italian Sausage Ragu

Chewy Oatmeal Chocolate Chip Cookies

A few days ago I was in the mood for chocolate chip cookies.  Typically when I make chocolate chip cookies I use either Nestle’s Tollhouse chocolate chip cookie recipe or Baking Illustrated’s Thick & Chewy chocolate chip cookie recipe.  I love both of those recipes, but since I’m expecting, I wanted to try a recipe that was a little bit healthier, so I made these oatmeal chocolate chip cookies instead.  In reality, they are probably not that much better for you (cookies are cookies after all!) but the fact that there is quite a bit of oatmeal in them does make me feel better about indulging in them.  :)

These cookies are so delicious – I love the chewy texture and the oatmeal flavor really comes through in them.  The secret to these cookies is that the oats are finely ground into a powder (instead of being left whole) before they are mixed into the batter.  I really like how the oatmeal powder provides the flavor (and health benefits!) of oats but with a much smoother texture than other oatmeal cookies.  I used semisweet chocolate chips in my cookies, but you could also use dark or milk chocolate, or omit the chocolate altogether and just make plain oatmeal cookies.  I hope you find these cookies as irresistible as I do!

Chewy Oatmeal Chocolate Chip Cookies

(print recipe)

Ingredients

  • 1 cup (2 sticks) unsalted butter
  • 1 cup granulated sugar
  • 1 cup light brown sugar
  • 2 eggs
  • 1 teaspoon vanilla extract
  • 2 ½ cups rolled oats
  • 2 cups all-purpose flour
  • ¾  teaspoon salt
  • 1 teaspoon baking powder (add a pinch more for softer cookies)
  • 1 teaspoon baking soda
  • 12-16 ounces chocolate chips (semisweet, milk, dark chocolate, or a combination – add more or less chocolate depending on your taste)
  • 1 ½ cups chopped nuts (optional)

Directions

  1. Preheat the oven to 350 degrees F and line 1 or 2 baking sheets with parchment paper.
  2. In the bowl of a stand mixer fitted with the paddle attachment, cream the butter and sugars.  Add the eggs and vanilla extract and mix to combine.
  3. After measuring out the rolled oats, place them in a food processor and process them until they turn to powder.
  4. Place all of the dry ingredients (oatmeal powder, flour, salt, baking powder & baking soda) in a separate bowl and whisk to combine.
  5. Add the dry ingredients to the mixer and mix until fully incorporated.  Then add the chocolate and nuts and mix to combine.  Place rounded tablespoon-sized balls of dough on the cookie sheets (a cookie scoop works well for this).
  6. Bake for 10-12 minutes at 350 degrees F.  Cool the cookies on the cookie sheets for 2 minutes and then transfer them to a wire rack to cool completely.

Yield:  Approximately 5 dozen cookies

Source: Adapted from a family friend

One Year Ago: Beach Ball Sugar Cookies

Two Little Cupcakes (An Announcement!)

You may have wondered why I haven’t been updating my blog very frequently lately.  Well, I do have a good reason!  In just a few months, my little family of two will become a family of four.  That’s right; Eric and I are expecting twins!  :)  We are having two girls and we are so excited!  Needless to say, I have been quite busy preparing for their arrival.  But I promise I will share the recipe for these yummy funfetti cupcakes very soon!

I also want to thank my sisters, Kristine and Lisa, and my Mom, who hosted a baby shower for me and my twin girls this past weekend.  The shower was so much fun and our friends and family were all so generous.  Please head on over to Kristine’s blog to see a recap of the baby shower, including all of the creative and adorable details and decorations, delicious menu, and fun games that we played. 


Enter your email address to subscribe to this blog and receive notifications of new posts by email.

Join 75 other subscribers